> ## Documentation Index
> Fetch the complete documentation index at: https://docs.axuremart.com/llms.txt
> Use this file to discover all available pages before exploring further.
# 模型配置
> 通过 cc switch 配置 GPT(Codex)模型
## 第一步:下载安装 cc switch
点击对应系统的按钮直接下载安装包,下载后双击安装。
CC-Switch-v3.16.5-Windows.msi
CC-Switch-v3.17.0-macOS.dmg
## 第二步:配置模型
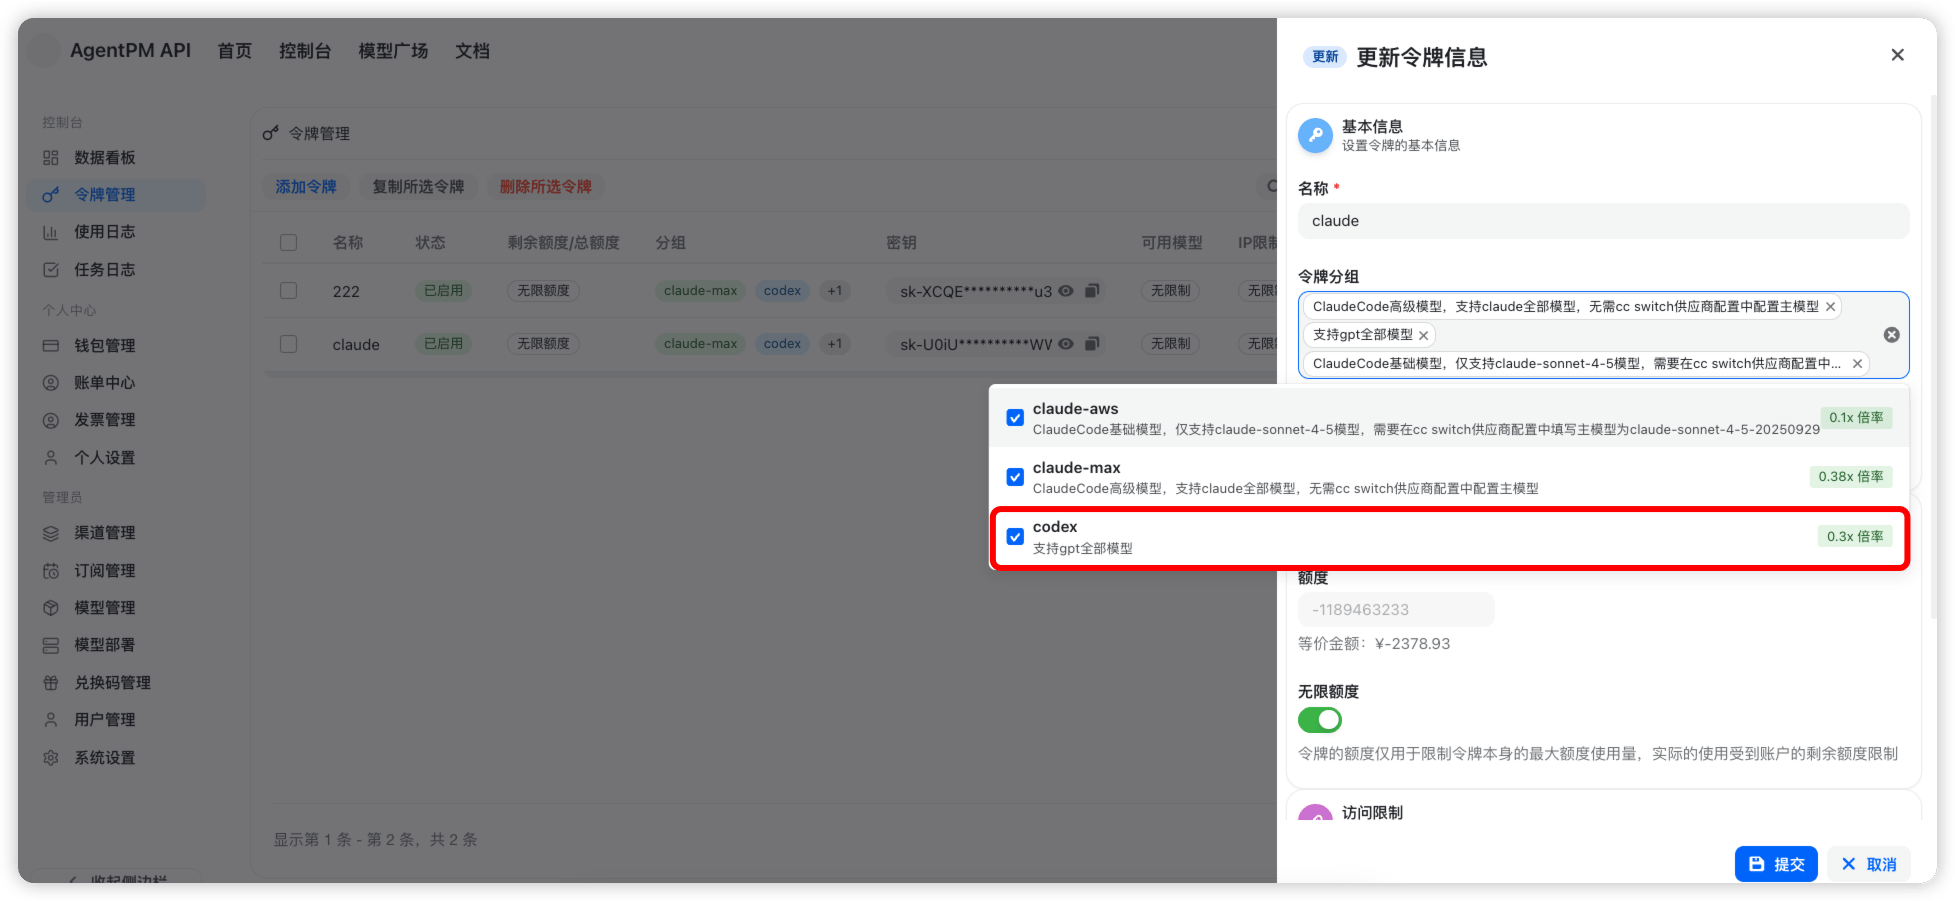
### 1、令牌分组必须勾选 codex 分组
 ### 2、cc switch 创建供应商并配置
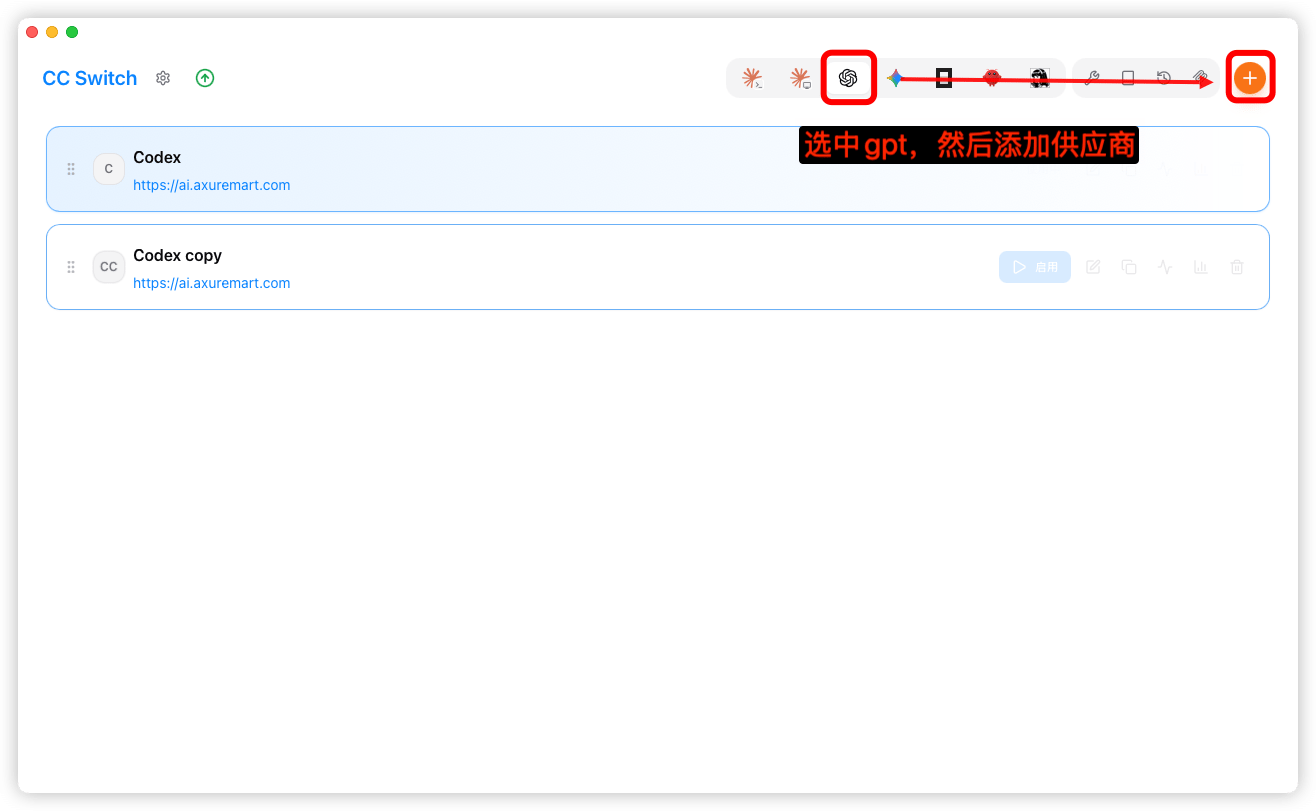
1. 打开后在 codex 分类下创建供应商
### 2、cc switch 创建供应商并配置
1. 打开后在 codex 分类下创建供应商
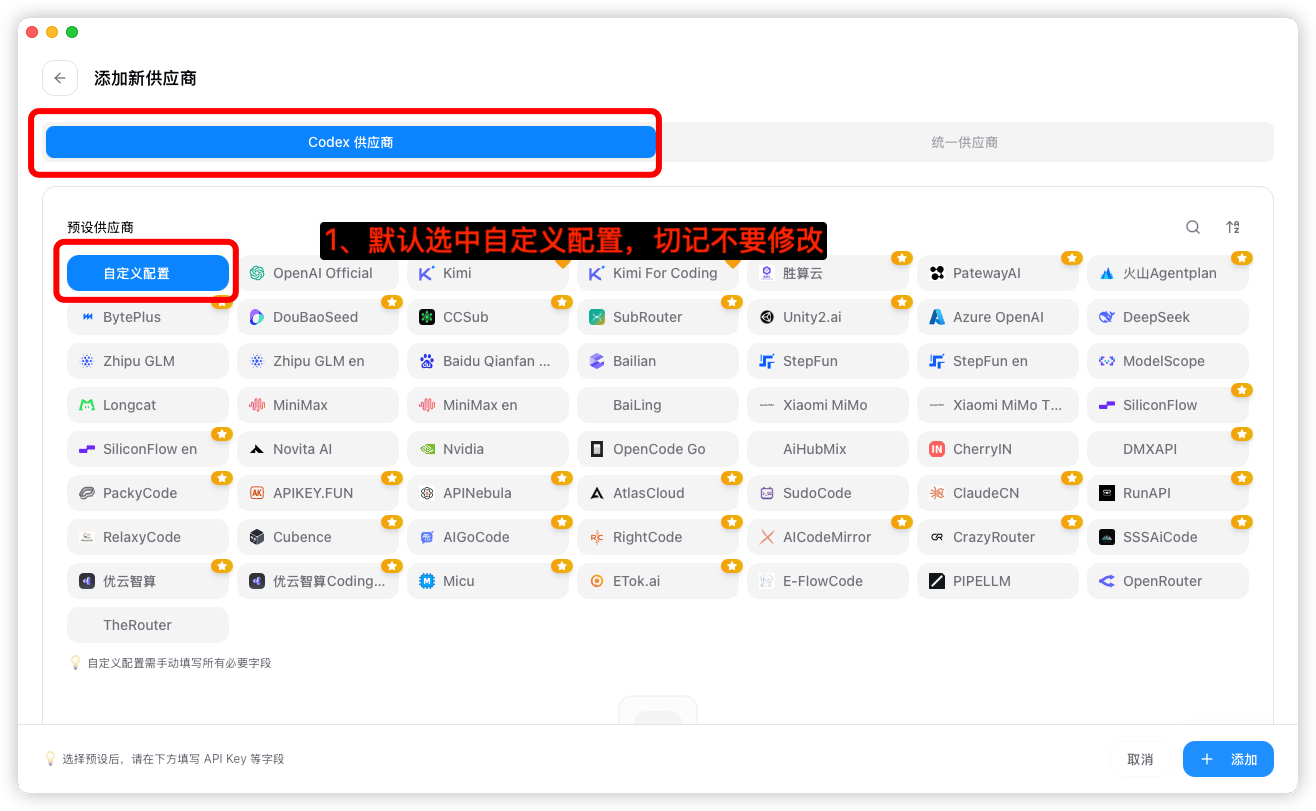
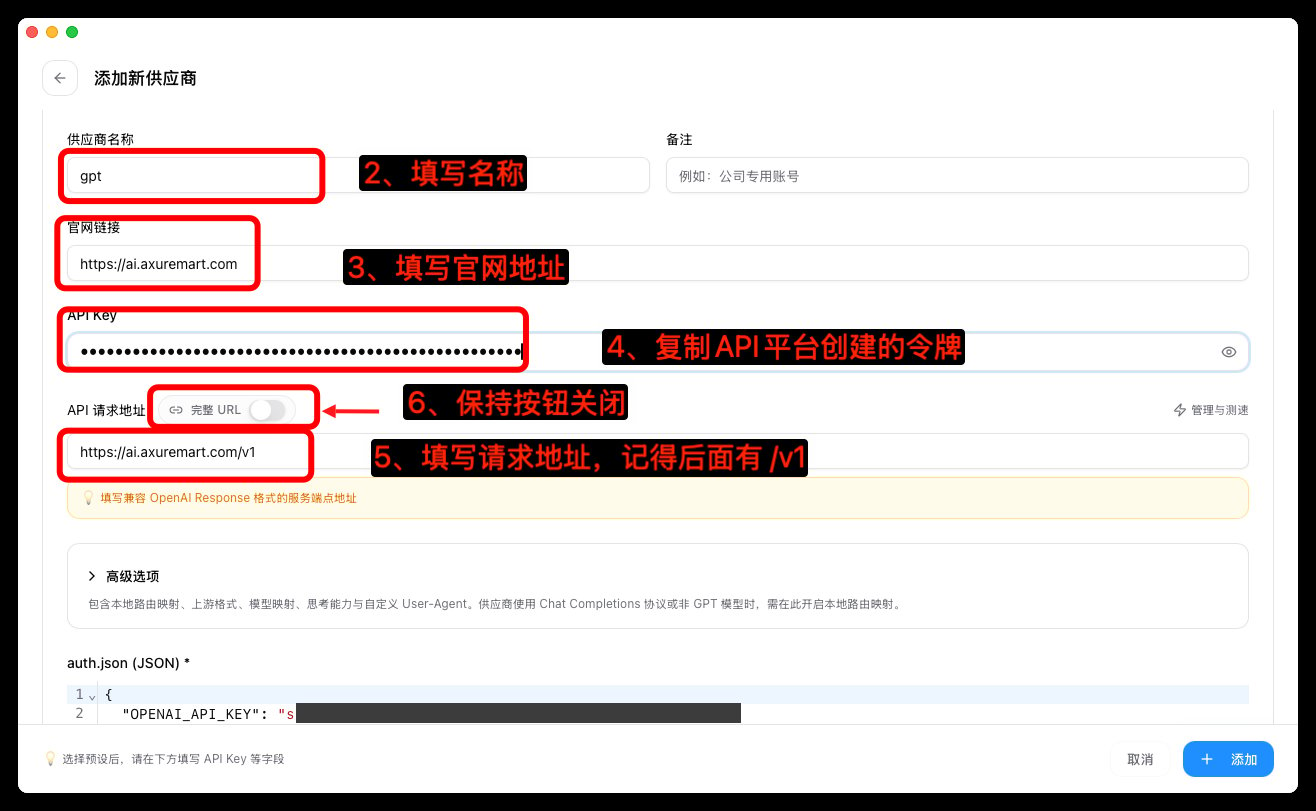
 2. 配置供应商
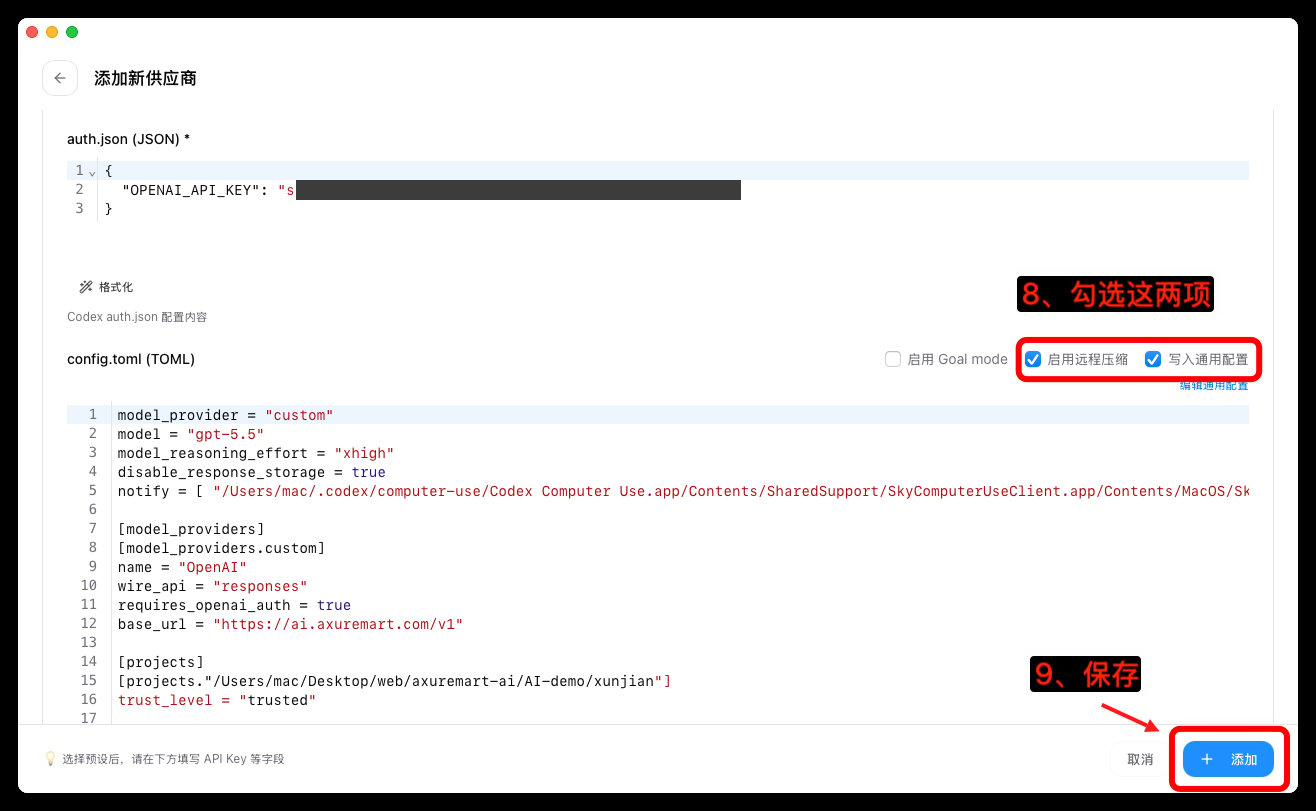 | 配置项 | 填写内容 |
| - | - |
| 供应商类型 | 自定义配置 |
| 名称 | 自己随意填写 |
| 官网链接 | `https://ai.axuremart.com` |
| API key | API 官网创建令牌后复制 |
| 请求地址 | `https://ai.axuremart.com/v1` |
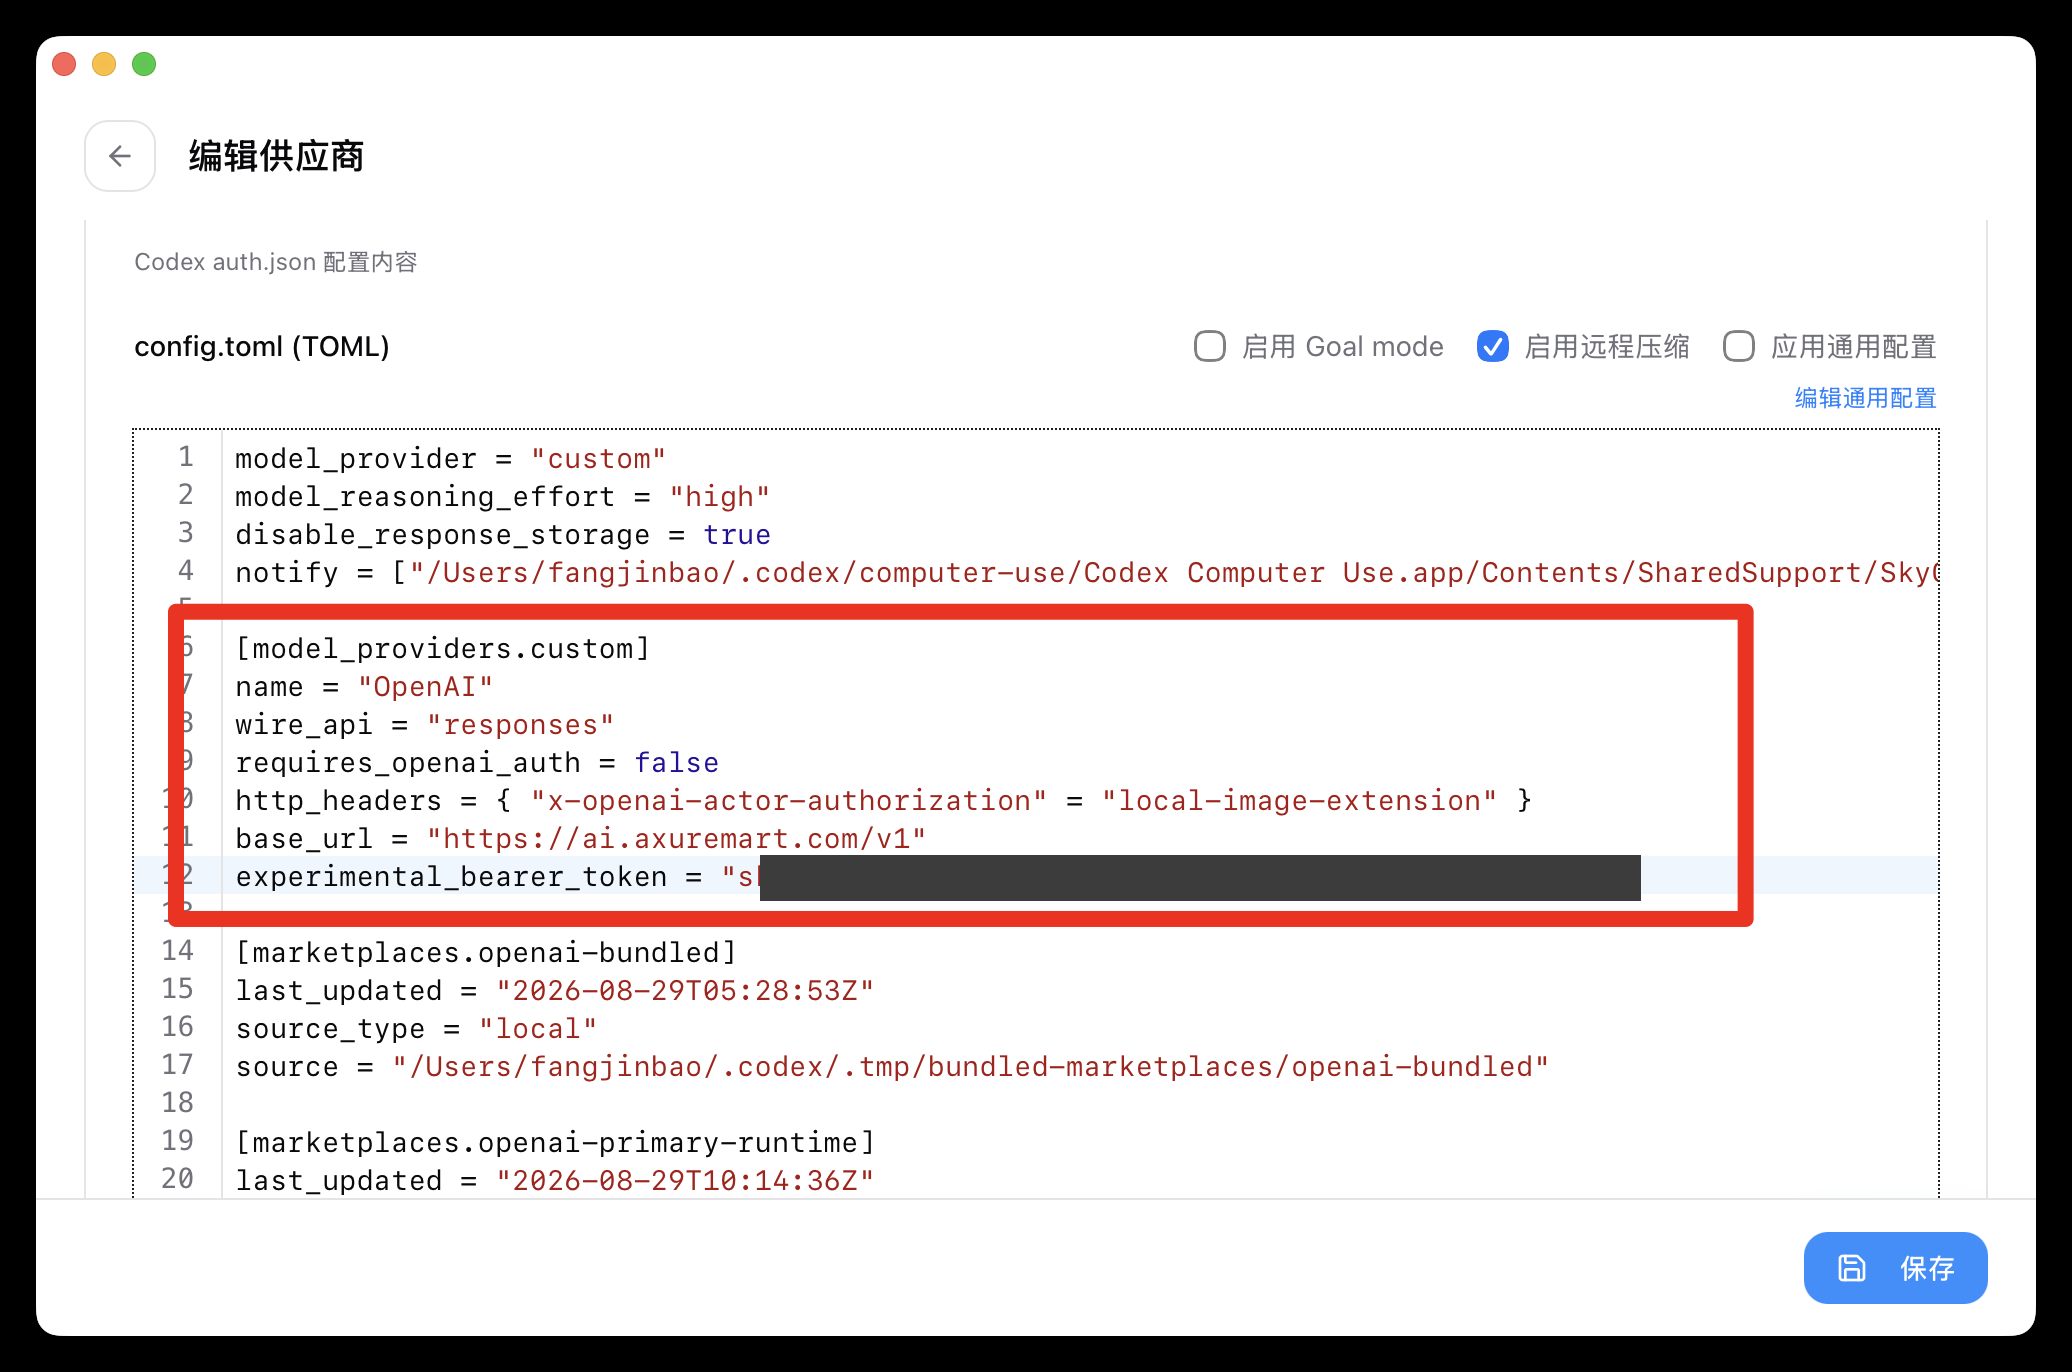
### 3、检查一下 config.toml 配置
确保 `[model_providers.custom]` 的配置与图中一致,否则无法调用模型。
如不一致,到对应路径下找到 `config.toml` 文件修改。文件所在路径:`~/.codex/config.toml`(Windows 为 `C:\Users\你的用户名\.codex\config.toml`)。
```toml theme={null}
[model_providers.custom]
name = "OpenAI"
wire_api = "responses"
requires_openai_auth = false
http_headers = { "x-openai-actor-authorization" = "local-image-extension" }
base_url = "https://ai.axuremart.com/v1"
experimental_bearer_token = "这里填写你的令牌key"
```
| 配置项 | 填写内容 |
| - | - |
| 供应商类型 | 自定义配置 |
| 名称 | 自己随意填写 |
| 官网链接 | `https://ai.axuremart.com` |
| API key | API 官网创建令牌后复制 |
| 请求地址 | `https://ai.axuremart.com/v1` |
### 3、检查一下 config.toml 配置
确保 `[model_providers.custom]` 的配置与图中一致,否则无法调用模型。
如不一致,到对应路径下找到 `config.toml` 文件修改。文件所在路径:`~/.codex/config.toml`(Windows 为 `C:\Users\你的用户名\.codex\config.toml`)。
```toml theme={null}
[model_providers.custom]
name = "OpenAI"
wire_api = "responses"
requires_openai_auth = false
http_headers = { "x-openai-actor-authorization" = "local-image-extension" }
base_url = "https://ai.axuremart.com/v1"
experimental_bearer_token = "这里填写你的令牌key"
```
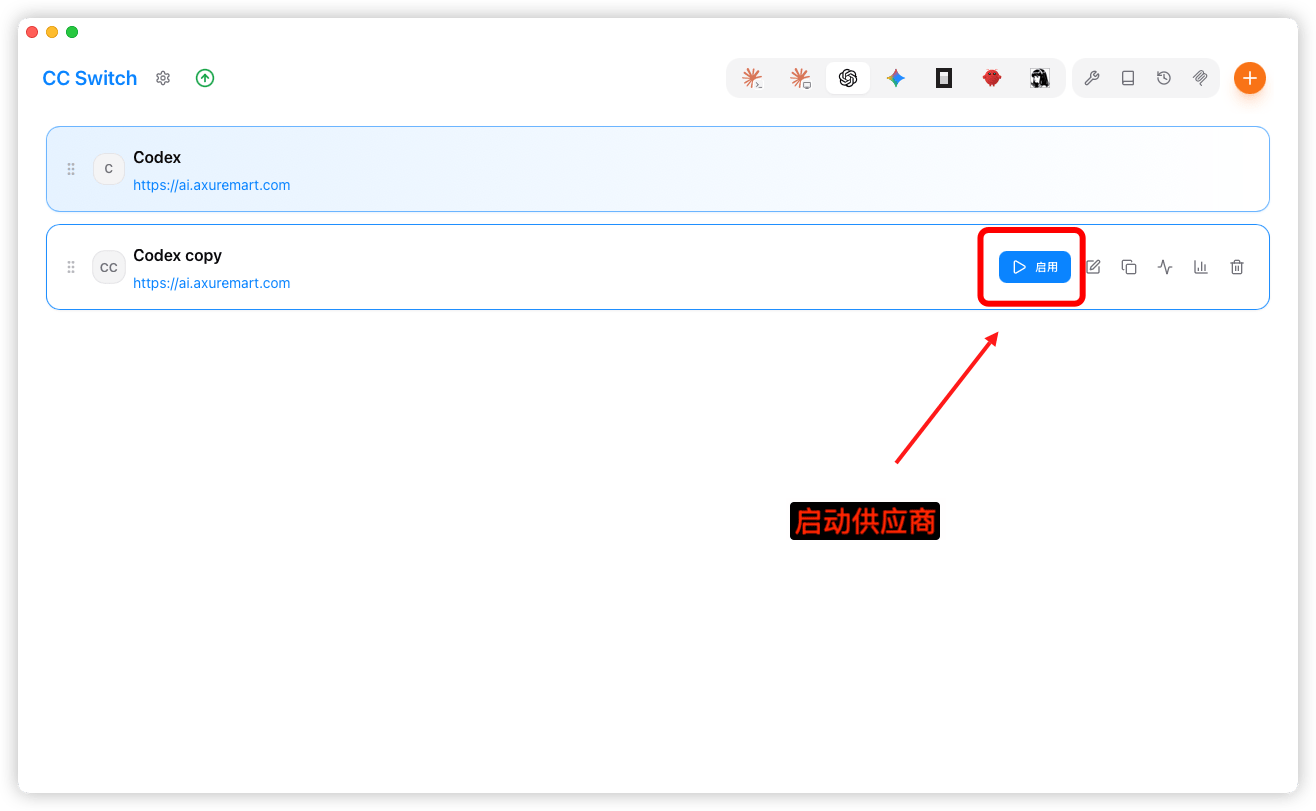
 ### 4、启用供应商
 This documentation is built and hosted on [Mintlify](https://mintlify.com), a developer documentation platform.